So I made this last night.
I didn't have any major expectations. It seemed pretty simple. The real reason I tried it was because I already had everything on hand. And you can never go wrong with combining this group of flavors.
But honestly? I was really, pleasantly surprised.
It ended up being so good.
I halved the recipe, since it was only going to be the two of us, and it ended up being the perfect amount. I also sauteed some mushrooms and garlic in some olive oil, mixed it with some angel hair pasta, then served the shrimp on top. You definitely must try it.
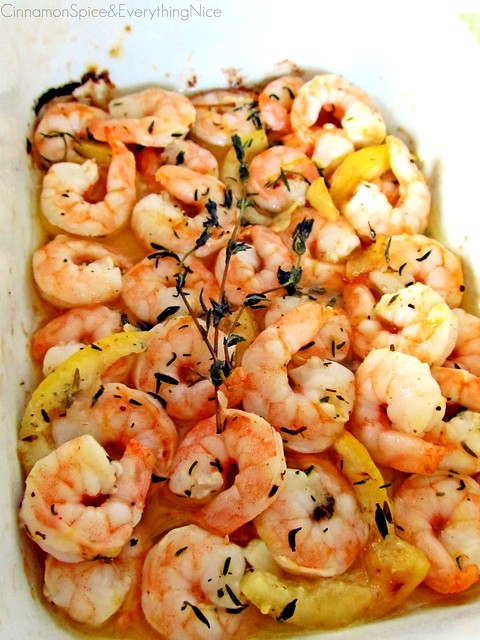
Roasted Lemon Garlic Herb Shrimp
(Original recipe by Bruce Weinstein, Mark Scarbrough.
Adapted by Reenie)
Ingredients
- 1/3 cup olive oil
- 1 lemon, zested then half cut into thin slices and other half into wedges
- 3-4 fresh thyme sprigs, leaves removed
- sea or kosher salt and fresh black pepper
- spaghetti/pasta, couscous or rice for serving
- 1 pound fresh shrimp, medium-sized, deveined with tails off
- 5 cloves garlic, minced
Directions
1. Preheat oven to 400 degrees F. In a 9x13 baking pan combine olive oil, lemon zest and thyme. Season with salt and pepper. Bake in oven for 12 minutes. Meanwhile cook pasta, couscous or rice.
2. Remove pan from oven, add shrimp, garlic and the thin sliced lemons (don't squeeze them), toss to coat with oil mixture. Bake for 8-10 more minutes or until shrimp turn pink and start to curl. Serve over pasta, couscous or rice tossed with extra-virgin olive oil and fresh-squeezed lemon with additional lemon wedges for serving.
2. Remove pan from oven, add shrimp, garlic and the thin sliced lemons (don't squeeze them), toss to coat with oil mixture. Bake for 8-10 more minutes or until shrimp turn pink and start to curl. Serve over pasta, couscous or rice tossed with extra-virgin olive oil and fresh-squeezed lemon with additional lemon wedges for serving.