Showing posts with label Healthy. Show all posts

Friday, January 20, 2012

Skinny Chicken Parmesan

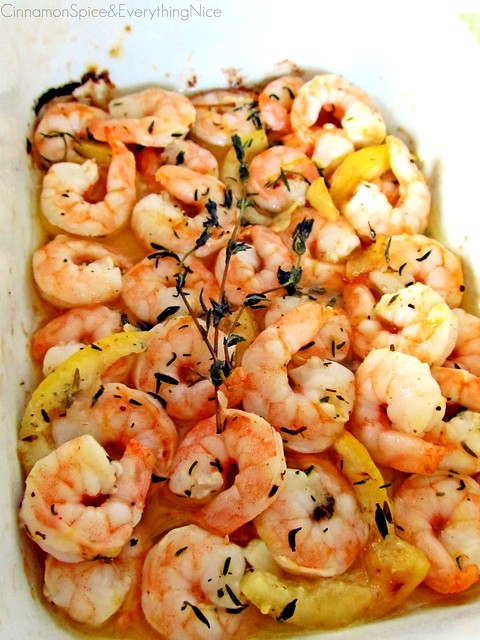
I love Chicken Parmesan. It was actually one of my favorite meals to eat at the cafeteria back in college, because they actually made it perfectly (can you believe it??).
I've never made it myself, though. I've always been too nervous I'd mess it up.
But when I saw this recipe, it sounded so simple, and I knew I had to give it a try. Especially since it's "skinny"! It definitely did NOT disappoint. Even my husband loved it. In fact, he devoured two pieces. I'm thinking this may have made it into one of our "regulars". :)

Skinny Chicken Parmesan
(Recipe by Allison)

 via

Ingredients
  • 2 (8 oz) chicken breasts, sliced in half (horizontally, or butterflied but cut all the way through. You will end up with 4 pieces of chicken)
  • 3/4 cup seasoned breadcrumbs (I used Panko)
  • 1/2 teaspoon garlic powder
  • 1/2 teaspoon Italian seasonings (I added a little more than this... maybe about 3/4 to 1 tsp)
  • 1/4 cup grated Parmesan cheese (This does not have to be fresh. In fact a use the stuff in the green bottle more times than not)
  • 1 1/2-2 tbsp butter, melted
  • 3/4 cup reduced fat mozzarella cheese
  • 1 cup marinara or your favorite spaghetti sauce
  • cooking spray      

Directions

 Preheat oven to 450°. Line large baking sheet with foil (easy clean up) and spray lightly with cooking spray.Combine breadcrumbs, Parmesan cheese, garlic powder, and Italian seasonings in a bowl. Melt the butter in the microwave in another bowl (this is usually melted after about 20 seconds, so watch it closely.) Lightly brush the butter onto the chicken, then dip into breadcrumb/cheese mixture. Place on baking sheet and repeat with the remaining 3 pieces of chicken.

Lightly spray a little more cooking spray on top (this makes it nice and crispy) and bake in the oven for 20 minutes. Remove chicken from oven and turn over. Spoon sauce over each piece and top with mozzarella cheese and bake another 5 minutes or until cheese is melted.

Yields: 4 servings


(255 calories per chicken breast, 6 WW Points+)


Tuesday, January 10, 2012

Skinny Spaghetti Squash Lasagna

To be honest, this isn't technically lasagna, so this recipe got an odd review from my husband.
He said it was "confusing, but good". Confusing, because he kept expecting to bite into some pasta. Good, because it is. I've joined Weight Watchers in a last-ditch effort to lose a few pounds and just eat healthier all-around. When I found this recipe, I really wanted to give it a try. I'd never had spaghetti squash before, so it was a fun new experiment for me.
I loved it, and it's a great healthy substitute for pasta. You could also use this as a side to some chicken or fish, if you like.


Skinny Spaghetti Squash Lasagna
(Recipe by Gina)


Ingredients

  • 2 cups marinara sauce

  • 3 cups cooked roasted spaghetti squash (follow the link to see how to bake a spaghetti squash)

  • 1 cup part skim ricotta

  • 8 tsp parmesan cheese

  • 6 oz part skim shredded mozzarella (I used Sargento)


  • Directions

    Preheat oven to 375°.

    In four individual 5 x 7-inch oven safe baking dishes, ladle 1/4 cup quick marinara sauce on the bottom of each dish. Top each with 3/4 cup of cooked spaghetti squash and spread evenly. Top each with 1/4 cup ricotta.

    *Note* If you don't have these particular baking dishes, use an 8x8 baking dish. It will still yield 4 servings.

    Sprinkle 1 teaspoon of grated parmesan cheese and .75 oz mozzarella on each. Add the remaining sauce, parmesan and mozzarella cheese. Cover with foil and bake for 15 - 20 minutes, or until the cheese is melted and the edges begin to bubble; uncover and cook an additional 5 minutes.

    Nutritional Info:
    Servings: 4 • Serving Size: 1 lasagna • Old Points: 6 pts • Points+: 7 pts
    Calories: 291.0 • Fat: 13.7 g • Protein: 19.6 g • Carb: 21.0 g • Fiber: 2.7 g
    Sodium: 358.3 mg 


    Monday, January 2, 2012

    Skinny Zucchini Ziti


    So have you made your New Years resolutions yet?
    I don't know about you, but this definitely needs to be the year I get back to my normal pre-baby weight. I mean, it's only been 2 years...
    Whether you're looking to shed a couple of pounds or just want to include some healthier meals in your repertoire, this recipe fits the bill. And who doesn't love the added bonus of it being a slow-cooker meal??
    I've included the nutritional info, as recorded by the original website, for your convenience.

    Skinny Zucchini Ziti

    (Recipe by fabfitfun.com)


    Ingredients
    • 1 1-lb., 7.8-oz. jar marinara sauce (no sugar added)
    • 3 cups penne shells, whole grain, dry)
    • 2 cups fat free cottage cheese
    • 2 cups skim mozzarella cheese, shredded
    • 1 large zucchini, sliced into 1/4-inch pieces
    • 1 tablespoon fresh oregano, finely chopped
    • 1 tablespoon fresh basil, finely chopped
    • 1/4 teaspoon black pepper
    Directions
    In a large mixing bowl, combine cottage cheese, mozzarella, oregano, basil, and black pepper.
    In the slow cooker, spoon 1/4 of marinara sauce onto the bottom, add 1 cup penne shells, 1/3 of zucchini slices and top with 1 cup cheese mixture. Repeat until you have three layers. Top with the remaining marinara and lastly, cheese. Note: Keep penne shells and cheese away from the edges by about 1 inch. Pasta tends to get hard and cheese burns if allowed to touch the sides while cooking.
    Cover and cook on low for approximately 2 hours or until penne noodles are al dente (took my slowcooker almost 3 hours... after 2, the noodles were still too tough!) . Not all slow cookers cook the same, so be sure that the penne is done before serving. Allow to cool for 15 minutes before serving.
    Pair a serving of this with a chicken breast and a helping of veggies for a wonderfully balanced meal!
    Tip: If you prefer your ziti a little more on the thick side, allow to cook an additional 30 minutes to 1 hour.
    Tip: If you’re on a tight budget, try Ragu Lite (no sugar added) and if you’re not, try Amy’s Organic Marinara Pasta Sauce.

    Minimum Slow Cooker Size: 5 quarts

    Check out other skinny Crock-Pot recipes here.
    Nutritional Information:
    Makes 13 servings
    Serving Size: 3/4 cup
    Calories: 168
    Total Fat: 8g
    Saturated Fat: 4g
    Trans Fat: 0g
    Cholesterol: 21mg
    Sodium: 476mg
    Carbohydrates: 25g
    Sugars: 4g
    Dietary Fiber: 2g
    Protein: 15g

    Tuesday, December 13, 2011

    Healthy Blueberry Muffins

    Lately, I've been having a hard time getting my little guy to eat anything healthy.
    He caught a cold last week, and every time this happens, all he agrees to eat is bread. Chips, muffins, toast, etc. No fruit, no veggies. So when this happens, I do my best to work with his taste buds.
    That's when I found this recipe. I altered it a little bit, just to help the texture and taste a little.
    It totally worked.
    I made these yesterday, and he's eaten like six of them so far.

    Healthy Blueberry Muffins
    (Adapted from Jill McKeever)


    Ingredients
    • 3/4 cups low fat milk
    • 1/2 cup natural applesauce
    • 1 egg
    • 1 Tbsp butter, softened
    • 1 cup all purpose flour
    • 1 cup whole wheat flour
    • 3/4 cup sugar (thinking I may substitute some of this with honey next time...)
    • 3 teaspoons baking powder
    • 1 teaspoon salt
    • 1 cup fresh or frozen blueberries (if you don't have any blueberries, you can always use raisins instead. still healthy, but much cheaper, especially in the cold months)
    Directions
    Preheat oven 400ºF degrees. Spray muffin pan with non-stick cooking spray or use cupcake liners.
    Blend milk, applesauce, egg, and butter in a small bowl and set aside.
    Stir flours, sugar, baking powder, and salt in a medium bowl. Make a well in the center and pour wet ingredients into the well. Stir just until the flour is moistened (batter will be lumpy). Fold in blueberries. Divide batter among muffin cups. Bake until golden brown; regular size muffins bake in 18 to 20 minutes, mini-muffins bake in 10 minutes. Immediately remove from pan.
    Makes 12 muffins.

    Special Touch:
    Mix 1/4 cup granulated sugar, 1/3 cup light brown sugar, 1 tsp cinnamon, and 2 Tbsp butter together. Sprinkle over muffins about halfway through baking for a crunchy, sugary topping.

    Tuesday, November 29, 2011

    Ham 'n' Veggie Soup

    So how was everyone's Thanksgiving??
    Anyone else feel the need to diet through Christmas now?
    Well, this soup makes great use of leftover ham you may have. It's hearty, flavorful, and healthy.
    The original recipe calls for a lot of salt, so in efforts to make it a little healthier (and tastier), I cut some of it out. I made this last year, and it was definitely a hit.
    For 160 calories a cup? Totally worth making.


    Ham 'n' Veggie Soup
    (Original recipe by Barbara Thompson)


    Ingredients

    • 1 medium onion, thinly sliced and separated into rings
    • 1 medium zucchini, cubed
    • 1 tablespoon olive oil
    • 1 pound sliced fresh mushrooms
    • 3 cups fresh or frozen corn
    • 3 cups cubed fully cooked ham
    • 6 medium tomatoes, peeled, seeded and chopped
    • 1/2 cup chicken broth
    • 1/2 teaspoon salt
    • 1/2 teaspoon garlic powder
    • 1/2 teaspoon pepper
    • Shredded part-skim mozzarella cheese

    Directions

    • In a large saucepan, saute onion and zucchini in oil for 5 minutes or until onion is tender. Add the mushrooms, corn and ham; cook and stir for 5 minutes.
    • Stir in the tomatoes, broth, salt, garlic powder and pepper. Bring to a boil. Reduce heat; cover and simmer for 5 minutes. Uncover; simmer 5-8 minutes longer. Garnish with mozzarella cheese. Yield: 8-10 servings.
    • 

    Tuesday, November 1, 2011

    Sweet Potato Mini-Muffins

    I made these over the weekend with my little guy. I had some sweet potato left over from dinner the night before, and I hate wasting food (especially healthy food!).
    As a baby, Noah looooooved sweet potatoes. His hands started turning orange, he ate so many. But since starting solids, he eventually lost that love. But I swear, as soon as he stopped eating so many of them, he started getting more colds and ear infections.
    I wanted to find a way to incorporate them back into his diet. But since he wasn't interested in eating them normally, I had to get a little creative. I found this recipe, and I'm SO happy with it.
    As soon as they were done, Noah ate FIVE of them.
    And he has no idea how healthy they are. Next time, I might try to replace some of the oil with applesauce. They have an oatmeal-cookie-like flavor, so I think the applesauce would work great.


    Sweet Potato Mini-Muffins
    (Original recipe by Catherine @ weelicious.com)


    Ingredients
    • 1 Cup All Purpose Flour
    • 1 Cup Old Fashioned Oats
    • 1/3 Cup Brown Sugar
    • 1 Tsp Baking Powder
    • 1/2 Tsp Baking Soda
    • 1/2 Tsp Salt
    • 1 Tsp Cinnamon
    • 2 Large Eggs, whisked
    • 1 Cup Sweet Potato Puree, cooked*
    • 1/2 Cup Milk
    • 1/4 Cup Canola or Vegetable Oil
    • 1 Tsp Vanilla Extract

    Directions

    Preheat oven to 350 F. Place the first 7 ingredients in a bowl and whisk to combine. In a separate bowl whisk the remaining ingredients.
    Slowly combine the dry ingredients with the wet ingredients just until they are combined (be careful not to over mix the batter).
    Place 1 tbsp of batter in each cup of greased mini muffin tins and bake for 15 minutes.
     Serve. (Makes 30 Mini Muffins)

    * To make sweet potato puree, bake sweet potatoes (or yams) in a 400 degree oven for one hour, allow to cool, slice in half lengthwise and mash flesh with a fork until smooth.
    ** You can place muffins in labeled freezer bags and freeze for up to 3 months.

    Wednesday, October 26, 2011

    Icy-Cold Banana Milk

    This is a drink I make when I want to make breakfast just that much better.
    It goes perfectly with some french toast, waffles, or just a simple bowl of oatmeal.


    Icy-Cold Banana Milk
    (Recipe by Sara Corpening Whiteford and Mary Corpening Barber)


    Ingredients
    •  2 cups milk
    • 2 small bananas
    • 1/4 cup maple syrup
    • 2 tsp vanilla extract
    • ice
    • pinch of nutmeg (optional)

    Directions
    Combine the milk, bananas, maple syrup, vanilla, and a handful of ice cubes in a blender. Blend until smooth and frothy, about 1 minute. Pour into glasses and sprinkle with nutmeg, if desired.


    Wednesday, October 12, 2011

    Slow-cooker Beef Stew

    I love me some hearty beef stew, especially on a chilly rainy day.
    This one is my favorite.
    And for you Weight Watchers fans, a cup is only 5 points.
    Not too bad for how delicious and filling it is!
    The red wine gives it a deep flavor, which is nice. But if you shy away from using wine in your cooking, you can always add some good quality red grape juice.
    It only uses a 1/2 cup, so it shouldn't alter the flavor enough to make a massive difference.
    Enjoy!

    Slowcooker Beef Stew
    (Original recipe by Rosa Minehan,
    published in Nov/Dec 2007 Paula Deen Magazine)


    Ingredients
    • 2 pounds beef stew meat
    • 3 large carrots, cut into 1-inch pieces
    • 2 medium baking potatoes, cut into 1-inch pieces
    • 1 (14.5 ounce) can Italian-style diced tomatoes
    • 1 (14.5 ounce) can beef broth
    • 1 (10.75 ounce) can tomato soup
    • 1/2 cup red wine
    • 1 tsp Italian seasoning
    • 1/2 tsp garlic salt

    Directions

    In a 6-qt electric slow cooker, combine all ingredients. Cover and cook on Low 8 to 9 hours, or until beef is tender.

    Monday, October 10, 2011

    Bean and Pasta Soup

    A few years ago, I invited my coworkers over for dinner. It was right after Christmas time, I think, and the first time they'd seen our new home. One of them brought me a Taste of Home "Heartwarming Soups" magazine. It's chock-full of incredible recipes.
    This one comes from that magazine and is one of my favorites.
    The flavors blend together perfectly, and most importantly, it's healthy!
    It's perfect for a chilly evening and super cheap to make too.
    And if you prefer vegetarian dishes, this one is for you.

    Bean and Pasta Soup
    (Original recipe by Maria Gooding)


    Ingredients
    • 1 cup uncooked small pasta
    • 2 celery ribs, thinly sliced
    • 2 medium carrots, thinly sliced
    • 1 medium onion, chopped
    • 1 garlic clove, minced
    • 1 tablespoon olive oil
    • 2 cups water
    • 1 can (14-1/2 ounces) diced tomatoes, undrained
    • 1-1/4 cups reduced-sodium chicken broth or vegetable broth
    • 1 teaspoon dried basil
    • 1/2 teaspoon dried rosemary, crushed
    • 1/4 teaspoon salt
    • 1/8 teaspoon pepper
    • 1 can (15 ounces) white kidney or cannellini beans, rinsed and drained
    • 2 cups shredded fresh spinach
    • 1/4 cup shredded Parmesan cheese, optional

    Directions

    • Cook pasta according to package directions. Meanwhile, in a large nonstick saucepan, saute the celery, carrots, onion and garlic in oil for 5 minutes. Stir in the water, tomatoes, broth, basil, rosemary, salt and pepper. Bring to a boil. Reduce heat; cover and simmer for 10 minutes or until carrots are tender.
    • Drain pasta; stir into vegetable mixture. Add the beans; heat through. Stir in spinach; cook until spinach is wilted, about 2 minutes. Sprinkle with Parmesan cheese if desired. Yield: 5 servings.

    Monday, September 26, 2011

    Weeknight Chicken Veggie Casserole

    Some people don't really like casseroles, and I totally understand. They can look pretty unattractive (no matter how great the lighting and angle, as you'll see in a sec), and who knows what people hide in them. However, there are some GREAT pros to casseroles.
    #1. You can throw just about anything in them, and they still taste good.
    #2. You can throw healthy anythings in them, and they still taste good.
    #3. They're economical.
    #4. They're a great use for leftovers. See #1 and #2.

    This dish happens to be one of those old stand-by's that my mom used to make. Consequently, it's turned into one of those for me as well. My husband is one of those people who doesn't particularly like casseroles. He doesn't like cream based dishes, and he doesn't trust what's in it.
    Except this one.
    It's tomato based, so it's not overly heavy. And I throw in ingredients that he normally eats (and a couple that he doesn't... but don't tell him). He also loves it, because he figured out how cheap it is to make. I always make this casserole with leftover chicken from the night before. It doesn't really matter what kind either... grilled, lemon-pepper, roasted... it all works.
    The best part is that you can make this casserole on a Sunday/Monday night, and the fam can eat off of it for several days (obviously depends on the size of your family, but you get the idea).
    Enjoy!

    Weeknight Chicken-Veggie Casserole
    (Original recipe by my momma)


    Ingredients
    • 1 (16 ounce) box rotini pasta (also works with ziti, bowtie, etc... pick a favorite and go for it). To add more nutrition, go for whole wheat.
    • 2 jars marinara sauce (I recommend Newman's Own Socarooni; it has a bunch of good stuff added in it that mixes well with the rest of the ingredients).
    • 2 cups Italian-style shredded cheese (or more, if you like), divided.
    • 1 (16 ounce) bag of frozen mixed veggies (peas, carrots, corn, etc), thawed (Tip: get the steam-in-a-bag kind to save some time).
    • 2 cups cooked chicken, cubed or torn into small pieces. (this also works well with ground beef/turkey, if you want to use that instead).
    • Optional: I like to kick up the nutrition and a little ground flax seed to the mix. You can't taste it, and it's a great way to give your kids a nutrition boost without them even knowing it.
    Directions
    Preheat oven to 350 degrees Fahrenheit.
    Cook pasta according to package instructions and drain. In a large bowl, mix pasta, marinara sauce, 1 cup shredded cheese, veggies, chicken, and flax seed. Pour into a 9x13 casserole dish. Top with remaining shredded cheese (sprinkle a little Parmesan on top, if you like).
    Bake in oven for about 15-20 minutes, or until cheese is melted.
    Yields 8-10 (or more) servings.
    

    Tuesday, August 23, 2011

    Roasted Lemon Garlic Herb Shrimp

    So I made this last night.
    I didn't have any major expectations. It seemed pretty simple. The real reason I tried it was because I already had everything on hand. And you can never go wrong with combining this group of flavors.
    But honestly? I was really, pleasantly surprised.
    It ended up being so good.
    I halved the recipe, since it was only going to be the two of us, and it ended up being the perfect amount. I also sauteed some mushrooms and garlic in some olive oil, mixed it with some angel hair pasta, then served the shrimp on top. You definitely must try it.


    Roasted Lemon Garlic Herb Shrimp
    (Original recipe by Bruce Weinstein, Mark Scarbrough.
    Adapted by Reenie)


    Ingredients
    • 1/3 cup olive oil
    • 1 lemon, zested then half cut into thin slices and other half into wedges
    • 3-4 fresh thyme sprigs, leaves removed
    • sea or kosher salt and fresh black pepper
    • spaghetti/pasta, couscous or rice for serving
    • 1 pound fresh shrimp, medium-sized, deveined with tails off
    • 5 cloves garlic, minced
    Directions

    1. Preheat oven to 400 degrees F. In a 9x13 baking pan combine olive oil, lemon zest and thyme. Season with salt and pepper. Bake in oven for 12 minutes. Meanwhile cook pasta, couscous or rice.

    2. Remove pan from oven, add shrimp, garlic and the thin sliced lemons (don't squeeze them), toss to coat with oil mixture. Bake for 8-10 more minutes or until shrimp turn pink and start to curl. Serve over pasta, couscous or rice tossed with extra-virgin olive oil and fresh-squeezed lemon with additional lemon wedges for serving.


    Wednesday, August 17, 2011

    Veggie Bites

    Last weekend, I hosted a baby shower for a friend.
    Throughout the shower, my mom and I (she helped me with the food) kept getting told, "This is the best shower food I've EVER.HAD."
    One of the favorites happened to be this recipe.
    From across the room, I saw one woman literally holding one of these up in the air, examining it to see if she could figure out how it was made. Cracked me up! And of course, I then gave them the recipe.

    These are great for showers, but really, they're perfect for any kind of part (especially in the summer).
    I don't remember where we originally got this recipe. Actually, it was passed on by friends of ours who were hosting a home party (for candles and lotions and stuff).
    We loved the appetizer and have used it tons of times ever since.
    There are a million variations of this, so feel free to experiment.

    Veggie Bites


    Ingredients
    • 1 (8 oz) can of refrigerated crescent rolls
    • 1 (8 oz) package cream cheese
    • 1 (1 oz) package Ranch dressing mix
    • 1/2 cup chopped red bell pepper
    • 1/2 cup chopped green bell pepper
    • 2 finely chopped carrots
    • 1/2 cup chopped green onion
    • 1/2 cup chopped broccoli
    Directions

    Preheat oven to 375 degrees F.
    Roll out crescent rolls onto a large non-stick baking sheet. Stretch and flatten to form a single rectangular shape on the baking sheet. Bake 11 to 13 minutes or until golden brown. Allow to cool.
    Place cream cheese in a medium bowl. Mix cream cheese with 1/2 of the Ranch dressing mix. Adjust the amount of dressing mix to taste. Spread the mixture over the cooled crust. Arrange carrots, bell peppers, green onions, and broccoli on top. Chill the refrigerator approximately 1 hour. Cut into bite-sized squares to serve.


    Friday, July 29, 2011

    Roasted Green Beans with Mushrooms, Balsamic, and Parmesan

    I absolutely adore roasted veggies.
    Seriously, just throw your favorite asortment on a cookie sheet, sprinkle with some olive oil and garlic powder... and oh my goodness, heaven.
    I saw this recipe on Pinterest, and I had to give it a whirl.
    The hubs isn't too big a fan of green beans, and didn't mind stating it... as he downed the dish.

    It's the perfect summer side. Not too heavy, but is still full of flavor.

    Roasted Green Beans with Mushrooms, Balsamic, and Parmesan
    (Original recipe by Kalyn from Kalyn's Kitchen)


    Ingredients
    • 8 oz. mushrooms, sliced in 1/2 inch slices (I used brown crimini mushrooms, but any mushrooms will work)
    • 1 lb. fresh green beans, preferably thin French style beans
    • 1 1/2 T olive oil
    • 1 T balsamic vinegar
    • salt and fresh ground black pepper to taste
    • 2 T finely grated parmesan cheese
    Directions
    Preheat oven to 450F/230C. Wash mushrooms and let drain (or spin dry in salad spinner, which is what I did.) While mushrooms are drying, trim ends of beans and cut beans in half so you have bite-sized pieces. (An easy way to trim them is to gather a small handful of beans, stand them up on cutting board, holding loosely so they will fall down and have ends ends aligned, then trim. Repeat with other end.) Cut mushrooms into slices 1/2 inch thick.

    Put cut beans and mushrooms into a Ziploc bag or plastic bowl. Whisk together olive oil and balsamic vinegar and pour over, then squeeze bag or stir so all the beans and mushrooms are lightly coated with the mixture. Arrange on large cookie sheet, spreading them out well so beans and mushrooms are not crowded. Roast 20-30 minutes, starting to check for doneness after 20 minutes. Cook until beans are tender-crisp, mushrooms are cooked, and all liquid on the pan from mushrooms has evaporated. Season beans to taste with salt and fresh ground pepper, then sprinkle with finely grated parmesan. Serve hot.

    Yields 4-6 servings.


    Sunday, July 24, 2011

    Caprese Salad

    I know, I know.
    Where have I been?
    I guess I took an unintentional summer hiatus from my food blog.
    (to read my regular ol' blog, go here)
    But summer's not over yet! I mean, really. Have you been outside??
    We've got a long way to go before Fall hits... at least where we live, anyway.

    However, my basil? Totally a fan of this heat.
    It's just gone crazy. So in an attempt to use it up, I've been scouring the internet looking for basil recipes.
    One of my favorite no-fail ways to use basil, though, is a light caprese salad.
    Absolutely delish.

    So here ya go.

    Caprese Salad


    Ingredients

    • 2 cups Balsamic Vinegar
    • 3 whole Ripe Tomatoes, Sliced Thick
    • 12 ounces, weight Mozzarella Cheese, Sliced Thick
    • Fresh Basil Leaves
    • Olive Oil, For Drizzling
    • Kosher Salt And Freshly Ground Black Pepper

    Directions

    In a small saucepan, bring balsamic vinegar to a boil over medium-low heat. Cook for 10 to 20 minutes, or until balsamic has reduced to a thicker glaze. Remove from heat and transfer to a bowl or cruet. Allow to cool.
    When you're ready to serve, arrange tomato and mozzarella slices on a platter. Arrange basil leaves between the slices. Drizzle olive oil over the top of the salad, getting a little bit on each slice. Do the same with the balsamic reduction, making designs if you want. Store extra balsamic reduction in fridge for a later use.
    End with a sprinkling of kosher salt and black pepper.

    Serve as a lunch, with crusty bread. Or serve alongside a beef main course for dinner.

    Yields: 8 servings (or one really big salad for yourself...)
    

    Friday, June 17, 2011

    Save Those Berries!


    Our family looooves blueberries, especially the little Piggy Wiggy.
    I probably don't have to mention all the pluses of eating blueberries... all the antioxidants, fiber, and vitamin C? One of the best super foods you can eat.
    Right now, blueberries are at their peak... and cheapest!
    The problem most people have is that they can't eat 5 cartons of blueberries in a week.
    And wouldn't it be nice to make those $1.65/carton berries last all summer?

    Well, that's my plan.

    Here's a quick and super simple way to freeze your own blueberries.

    Here's what you'll need:
    - Cookie sheet or flat tray
    - Freezer bags
    - A freezer :)

    #1. Pick through and toss the bad ones (usually if you picked them yourself).
    #2. Lay them out in a single layer on a cookie sheet.
    #3. Freeze them (I leave them in there for a good 24 hours).
    #4. Stick them in a freezer bag (better if you have those vacuum sealer bags). Make sure you get as much air out as possible to prevent freezer burn. Try sticking a straw in the corner, sealing it as tightly as possible up to the straw, then suck the leftover air out. Quickly remove the straw and seal.
    #5. It's recommended to store for up to 3 months, so make sure to label your bag with the date.

    As for washing, you have two choices: wash before or after freezing.
    Before: Wash and drain in a colander. Let stand at least 10 minutes to dry. If necessary, pat any leftover water with a paper towel.
    Any remaining water will make the blueberries stick together after frozen (which isn't that big of a problem. they should break apart pretty easily) and might cause some freezer burn. Also? Washing before gives the blueberries a tendency to get a little mushy when thawing.

    After: Most people prefer to wash their berries after freezing, just to minimize the possibility of freezer burn.

    Sometimes, if you're lucky, you can find them pre-washed (particularly if they're organic).
    It's totally up to you. I washed mine before freezing, and I haven't had a problem. But my little guy is used to mushier blueberries from the frozen kind you buy at the store, so he doesn't care.

    And that's it!
    This process works for any kind of berry, actually.

    Once you're done?
    Give some of these blueberry treats a try!

    (Weight Watcher's friendly!)


    Need a gluten-free option?
    Try these!


    Monday, May 16, 2011

    Deceptively Delicious Brownies

    My little guy (he's 20 months) is actually a pretty good eater.
    But I'm perfectly aware of what he likes and what he doesn't. For some reason, he no longer wants to have anything to do with carrots. He used to love them as a baby, but now? Not so much. Go figure.
    He also used to love spinach. I haven't tried lately, but my guess is that he'd purse his lips, shake his head, and throw it on the floor. Since I don't enjoy cleaning food off the floor more than I have to, I decided there had to be a better way. A few years ago (before I was even married), I saw Jessica Seinfeld on Oprah. She had just come out with her cookbook Deceptively Delicious. I obviously didn't have much use for it yet, but I knew it'd come in handy one day. So I went out and grabbed a copy. And I was right.
    I found this recipe in there and gave it a whirl.

    Here's the thing.
    They're not overly sweet like most box brownies, but they still satisfy that brownie craving. Plus, it's healthy. Like for real. A healthy brownie. That tastes good.
    Each brownie has only 133 calories and 3 grams of fiber.
    Like it says in her book, "That's just crazy for a brownie!"

    And if my opinion isn't enough to sway you into trying them, how about this for proof?

    Mmmm.... good carrots and spinach.

    Deceptively Delicious Brownies
    (Original recipe by Jessica Seinfeld)

    (photo source)

    Spinach puree:
    Saute spinach leaves (make sure to cut off stems, or use baby spinach) in pan with 1 Tbsp of water for about 90 seconds until wilted. Puree in food processor or blender.

    Carrot puree:
    Steam carrots until tender. Puree in food processor or blender.

    Ingredients
    • Nonstick cooking spray
    • 3 ounces semisweet or bittersweet chocolate
    • 1⁄2 cup carrot puree
    • 1⁄2 cup spinach puree
    • 1⁄2 cup firmly packed light or dark brown sugar
    • 1⁄4 cup unsweetened cocoa powder
    • 2 tablespoons trans-fat-free soft tub margarine spread (I used butter)
    • 2 teaspoons pure vanilla extract
    • 2 large egg whites
    • 3⁄4 cup oat flour, or all-purpose flour
    • 1⁄2 teaspoon baking powder
    • 1⁄2 teaspoon salt
    Directions
    1. Preheat the oven to 350 degrees. Coat an 8x8-inch baking pan with cooking spray.
    2. Melt the chocolate in a double boiler or over a very low flame. (or microwave in 30 second intervals, stirring after each interval, until melted).
    3. In a large bowl, combine the melted chocolate, vegetable purees, sugar, cocoa powder, margarine, and vanilla, and whisk until smooth and creamy, 1 to 2 minutes.
    4. Whisk in egg whites. Stir in the flour, baking powder, and salt with a wooden spoon.
    5. Pour the batter into the pan and bake 35 to 40 minutes. Cool completely in the pan before cutting into 12 bars.

    Friday, April 1, 2011

    Berry Banana Protein Shake

    I know I feature an awful lot of fattening tasty but less-than-healthy dishes.
    So hopefully this will make up for it.
    I love making smoothies. But I'm a little picky. I don't like the pre-made packages, especially the kind that come with a "smoothie mix" to thicken it up. Have you ever looked at the ingredients on those things?
    Word of warning... if you can't pronounce it, you might need to think twice about eating it.
    I'm all about eating good, natural food (although you may not be able to tell from this blog). It really is important to be educated about the stuff we choose to put in our bodies. They do make an impact.
    If it's healthy and tastes good? Sign me up.
    My husband used to be a big fitness junkie. That was until he had heart surgery, was told he couldn't lift anything heavier than a milk carton, and then he was too scared to try exercise. Anyways, he explained his fears at his last cardiologist appt, and he was given the go-ahead. He's also trying to help me out (darn those last 10 pregnancy lbs that just won't go away!) and get me all hot and toned up and stuff again. He used to swear by protein shakes. I remember him drinking that stuff, and it tasted pretty nasty. We bought more powder, and I've been determined to get more protein in my diet but also actually enjoy the smoothies.

    All of this is to say... I did it.
    In one try.
    I made one of the best protein shakes I've ever tasted for lunch today.
    If you're interested, give it a shot. If you don't need any extra protein or don't want to buy powder, go ahead and skip that step. The smoothie is ridiculously good without it too.

    Berry Banana Protein Shake
    (Original recipe by ME!)


    Ingredients
    • 1 cup whole fresh or frozen strawberries*
    • 1/2 cup fresh or frozen blueberries*
    • 1 banana
    • 1/2 cup natural vanilla yogurt (I use Dannon All-Natural vanilla)
    • 1/4 cup apple juice
    • 1/4 tsp ground cinnamon
    • 1/2 scoop vanilla-flavored protein powder (or more, depending on your dietary needs)... if skipping this step, substitute with 1 scant tsp vanilla extract
    Directions

    Combine ingredients in a food processor or blender until smooth (or desired consistency).
    Yields 2-3 servings.

    *If using fresh fruit, add a couple of ice cubes to help get things chilly.

    If you're feeling inspired, get in the kitchen and come up with your own fun smoothie, using your favorite fruits (and veggies!).
    Hope you like it!